Here’s How To Cook Good Food On $15 A Day Or Less
 The $15-a-day debate is about whether we still value self-reliance, basic household skills, and personal responsibility.
As this story's headline indicates, I'm not much of a cook.
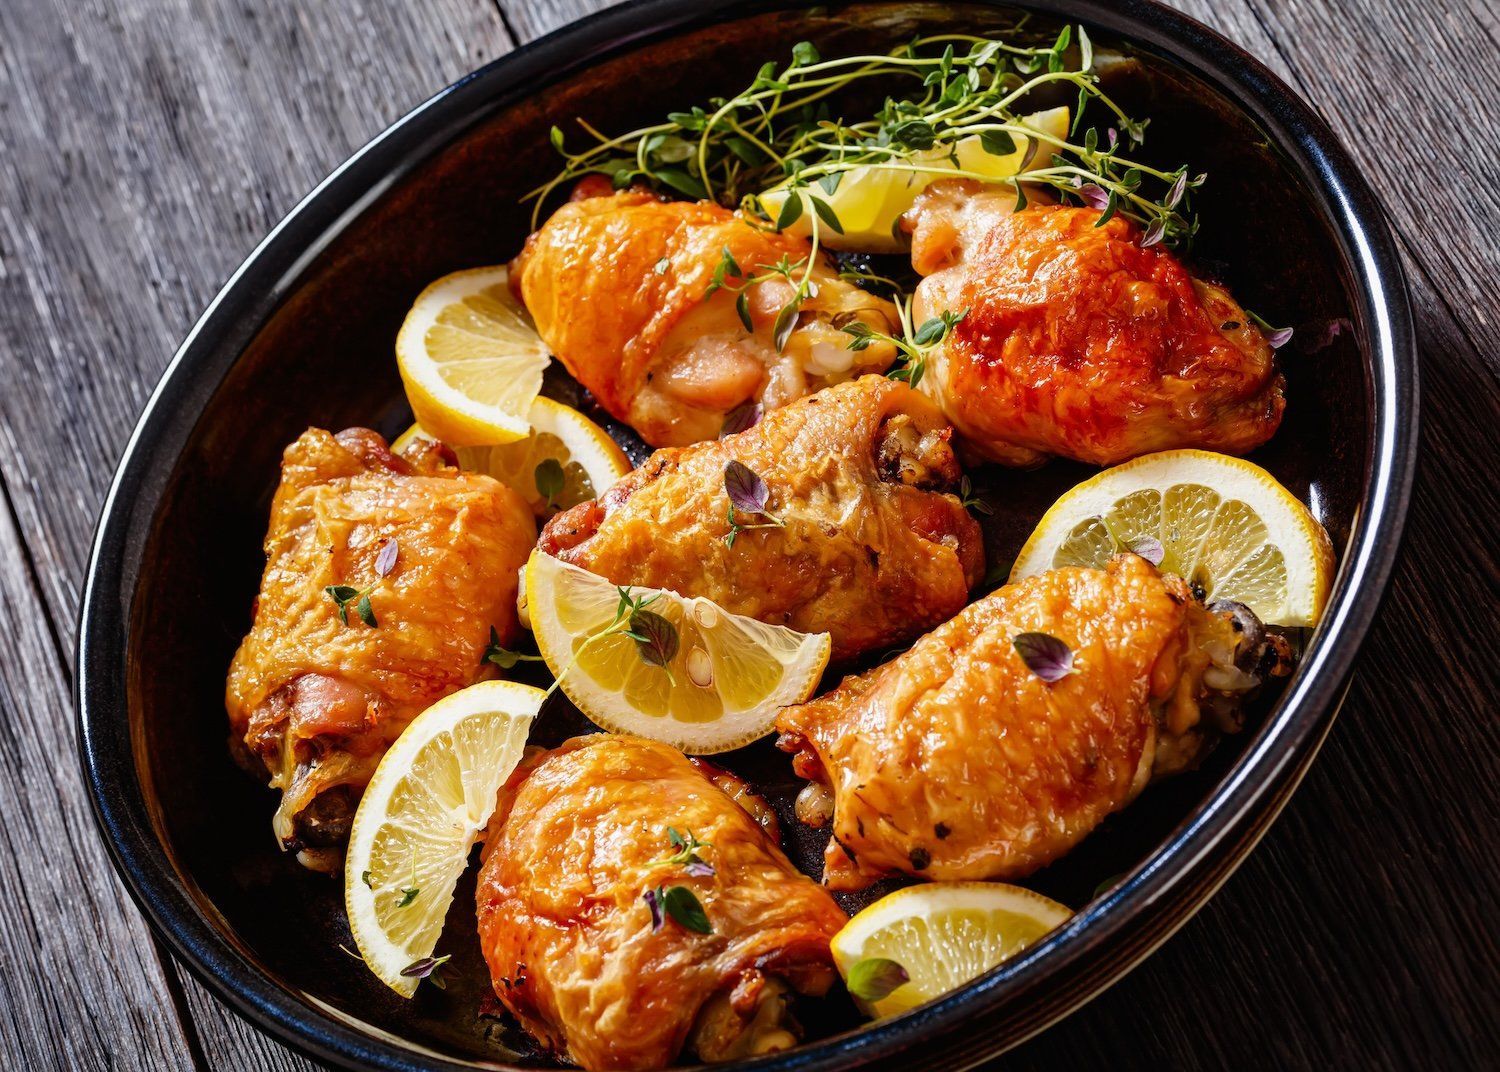
I can do meatloaf in a pinch and can manage some roasted veggies — and I've even been known to create some of the best baked spicy chicken wings this side of ... well, this side of my street. Maybe.
'Let's get to cookin'!'
That said, this Thanksgiving Day, do you have plans for all those leftovers that have predictably piled up after dinner is done? All of that turkey, stuffing, and, of course, cranberry sauce?
Sure, there are plenty of exotic recipes for leftovers out there that require a bit of effort — as well as ingredients that may not be so easy to procure if you don't already have them on hand (especially amid crowded Black Friday shopping conditions). And who wants to exert even more effort after hours and hours of prep time and cooking time on this holiday?
Certainly not me — and I'm not even the one doing the Thanksgiving cooking. Ease and speed and comfort are the kings in this kitchen.
In an effort to help y'all think ahead, how about a trio of post-holiday sandwich ideas that can win the day and pare down the piles of food left in your fridge?
This entertaining fellow — his YouTube handle is @morehowtobbqright — presents on video what appears to be an easy recipe for sliders that even I'd be game to try. (He also calls them "samiches," so you know they're gonna be good.)
Our chef tells us, "Let's get to cookin'!" and then shows us how.
Looks like you need a pack of King's Hawaiian Savory Butter Rolls — but hey, maybe you can repurpose leftover dinner rolls from your T-Day feast too. He says you then place all the bottom roll halves on foil, pile up a bunch of American cheese slices, followed by leftover turkey pieces, then your leftover stuffing, then your leftover cranberry sauce — followed by, you guessed it, more of those American cheese slices — and then you pop the top halves of the rolls on top to crown your creation.
Our chef also instructs us to melt some butter and brush it on the top of the "samiches," after which you wrap 'em all in foil and then bake them on a tray for 30 minutes at 350 degrees. Then you uncover the sliders and bake them for 15 more minutes to brown the tops.
Believe it or not, even easier than the sliders.
Our chef — her YouTube handle is @MealsWithMaria — shows us in a less-than-30-second video how simple these quesadillas are to create.
Just warm some butter in a skillet over medium heat and add a tortilla. Then add leftover mashed potatoes, leftover sweet potatoes, shredded Monterey Jack cheese, and chunks of leftover turkey. Then you fry it all up until the cheese is melted and the tortilla is crispy.
Finally, for the last minute of heat, you add some leftover cranberry sauce on top and fold over the tortilla. She suggests slicing it in half and, if you want, dipping it in leftover gravy.
OK, now for the "deluxe" portion of our program.
Our YouTube guide — his handle is @Chef_Tyler — presents a snazzy grilled cheese sandwich recipe in his brief video. First, he suggests toasting your leftover bread in an oiled pan before assembling the stuff in the middle. (It also looks like he's slicing part of a leftover hard-crusted loaf. This is already a mighty big cut above the grilled cheese I typically make.)
He then tells us to mix our leftover cranberries with mayo — to prevent things from getting soggy — and then spread the mixture on the toasted bread. (Oh, got any herbs on hand? They're good for that cranberry-mayo spread too.)
Then you put your cheese on top of the spread — he recommends slices of aged cheddar or gouda, but anything will do. Then the leftover turkey chunks. The drier the better, believe it or not. (And don't forget to heat the turkey in the pan before putting it on top of the cheese, as Chef Tyler says that will help the cheese melt faster.)
It appears you cook the sandwich on both sides until the crust is golden brown — natch — and then dip it in leftover gravy if you want.
Happy Thanksgiving — and the days after — one and all!
Like Blaze News? Bypass the censors, sign up for our newsletters, and get stories like this direct to your inbox. Sign up here!
This Thanksgiving, consider the poor turkey. Is there any animal we consume with less gusto?
It has become something of annual tradition to denigrate the day's traditional fare. Nearly 35% of Americans claim turkey is their least favorite part of the feast, according to one recent survey.
This vintage Better Homes and Gardens recipe is a bit of a cheat, as it does use turkey — although not in any form you're likely to recognize
The internet just stokes the hatred. Every year the same tiresome "contrarian" opinions: "Stop pretending you like turkey. It's no good on Thanksgiving, or any other day."
Even celebrity chefs can't resist punching down. "Turkey is wildly overrated," says restaurateur David Chang.
"The only reason to cook the turkey is to get the gravy, and then you can just give the turkey away."
We must admit that turkey-haters have a point. Yes, turkey meat can be dry and flavorless (although brining is a dependable way to avoid that). And yes, the tradition of eating turkey — and most Thanksgiving foods — was essentially created by advertising in the early 20th century. (College freshman home for fall break voice: "It's all a scam by Big Cranberry!")
While we're content to stick with the standard flightless fowl, there were plenty of other contenders in the great battle for the Thanksgiving table. As a service, we provide the following recipes for anyone wanting to change it up.
Among the meats served at the first Thanksgiving in Plymouth would surely have been this vital freshwater food source. The 1622 promotional pamphlet for the Plymouth colony "Mourt's Relation" describes how the Wampanoag native Tisquantum (better known as Squanto) taught the Pilgrims to catch the slippery, succulent treats.
Tisquantum went at noon to fish for Eels, at night he came home with as many as he could well lift in one hand, which our people were glad of, they were fat & sweet, he trod them out with his feet, and so caught them with his hands, without any other Instrument.
Here's how they might have prepared it:
Ingredients
Instructions
Long a favorite of European royals (peasants were forbidden to hunt them), swan was plentiful in the New World and was most likely one of the waterfowl consumed at the first Thanksgiving.
Here's a recipe from Hannah Woolley’s "The Queen-like Closet," (1670) a cookbook that later colonists would have had in their kitchens:
To bake a Swan.
Scald it and take out the bones, and parboil it, then season it very well with Pepper, Salt and Ginger, then lard it, and put it in a deep Coffin of Rye Paste with store of Butter, close it and bake it very well, and when it is baked, fill up the Vent-hole with melted Butter, and so keep it; serve it in as you do the Beef-Pie.
For something more elaborate, here's a preparation from the late 14th century cookbook “Le Menagier de Paris”:
Pluck like a chicken or goose, scald, or boil; spit, skewer in four places, and roast with all its feet and beak, and leave the head unplucked; and eat with yellow pepper.
Item, if you wish, it may be gilded.
Item, when you kill it, you should split its head down to the shoulders.
Item, sometimes they are skinned and reclothed.
RECLOTHED SWAN in its skin with all the feathers. Take it and split it between the shoulders, and cut it along the stomach: then take off the skin from the neck cut at the shoulders, holding the body by the feet; then put it on the spit, and skewer it and gild it. And when it is cooked, it must be reclothed in its skin, and let the neck be nice and straight or flat; and let it be eaten with yellow pepper.
Though extinct for more than a century, passenger pigeons were once as abundant as the kind you see fouling statues in urban parks. While we wouldn't recommend eating those birds, Cornish game hen or squab make a decent substitute.
Ingredients
Instructions
1. Prepare the meat
2. Make the gravy
3. Assemble the pie
4. Bake
Outdoor Dutch oven method (historical):
Modern oven method:
5. Serve. Let cool slightly before slicing.
In 1904, railroad heir George Vanderbilt and his wife, Edith, hosted a lavish Thanksgiving at their Asheville estate, Biltmore. Turkey was on the menu — but so were calf's brains. Here's one preparation that guarantees a delicate, custardy mouthfeel:
Ingredients
Instructions
1. Prep the brains
2. Cook the mushrooms
3. Add the brains
4. Finish the sauce
5. Serve. Spoon the mixture over warm toast. Serve immediately.
Now the most unwanted vegetable on the crudite platter, this Bloody Mary garnish was a highly coveted status symbol of the Gilded Age (it was hard to grow). Everyone will want the recipe.
Ingredients
Instructions
1. Trim the celery
2. Refresh the stalks
3. Present with appropriate ceremony
4. Serve. Place the celery in the center of the table. Offer a pinch dish of salt on the side.
Note: In the late 19th century, this was considered a showpiece delicacy. Your guests are encouraged to admire its beauty before eating it exactly as it is.
This vintage Better Homes and Gardens recipe is a bit of a cheat, as it does use turkey — although not in any form you're likely to recognize.
Ingredients
Instructions
1. Make the gelatin base
2. Prepare the turkey layer
3. Prepare the sour cream-pear layer
4. Add second layer
5. Unmold and serve
This liturgy is designed for any time you step into the kitchen to make bread. You will notice the sections marked for a breath prayer and a collect — these are the places you can insert prayers specific to the season or the occasion you are baking for, or you can insert prayers of your own.
Begin by gathering your supplies: 3 cups all-purpose or bread flour and 1/2 cup whole-wheat flour; 1½ teaspoons kosher salt; 1/4 teaspoon instant yeast; 1½ cups room-temperature water; a three-quart mixing bowl; measuring cups and spoons; a bowl scraper; plastic wrap or a tea towel; a baking sheet, loaf pan, or Dutch oven; and, if you’d like, your Bible.
As you prepare your workspace, also prepare your heart and mind. Ask God to join you in this process of baking bread. Slowly breathe and meditate on these words:
Inhale: My soul finds rest
Exhale: in God alone.
Psalm 62:1
As you measure your ingredients, continue this meditative breathing. Feel the texture and temperature of each element between your fingers as you combine the dry ingredients together. Give thanks for the community of farmers, millers, and grocers who have brought these ingredients to your kitchen today. Give thanks for the bakers across generations who have passed down these traditions. And give thanks for the Christians who have clung to the closeness of Jesus in the baking and breaking of bread.
When the time comes to mix your dough, inhale and exhale with each line of the breath prayer of your choosing.Pour the water into the center of the well. With your fingers, slowly pull the flour bit by bit into the watery center. Thicken the water slowly, rubbing out dry clumps of flour that form. Contemplate how the substances transform within your hands. Continue mixing until all the flour has been hydrated.
Cover your mixture with plastic wrap or a damp tea towel and step away to a silent place for half an hour to read, pray, or be still in God’s presence. As you do, pray:
God, may I trust that transformation takes place, even when my hands and heart are at rest.
Uncover your mixture once again and grip one side firmly in your hand. Stretch and fold and contemplate the change that has occurred: water flooding and softening the grain, bursting open its tightly wound but untapped strength. Stretch the side and fold it over the dough; rotate the bowl 90 degrees and repeat.
As you build both elasticity and strength, pray in this way:
Inhale: Oh God (stretch) who comes (fold)
Exhale: to us (stretch) in bread (fold),
Inhale: do not (stretch) let us (fold)
Exhale: go (stretch and fold).
Repeat four or more times, as needed, then cover your dough and let it rest for its long fermentation (8-18 hours). If you need to wait 24 hours or more before shaping, let the dough rest for four hours, then place it in the fridge until you’re ready to bake the loaf.
When your dough is ready for shaping, turn it onto the counter. Marvel at the beauty and strength of your dough, at the bubbles that signal new and growing life. Smell the scent of fermentation, tangy and a little bit sweet. As you divide, stretch, round, or fold, pray the words of the collect of your choosing.
When the dough enters its final 30-60 minute proof, relaxing into its newfound strength, repeat these words:
God just as I step away from this dough, asking the proteins to rest and the yeast to prove that it is still alive, I ask you to prove your continual steadfast love for me.
Meanwhile, preheat the oven to 425° (450° if using a sandwich pan or baking tray).
When your loaf is ready for baking, slide it into the preheated oven. If your oven door allows you to see inside, watch the dough rise, burp, then fall into shape. Pay attention to the smell that fills your kitchen in the minutes ahead. Find joy in the creativity of God, who made ingredients with the ability to change in this way and who gave humans the idea to combine them.
While the dough bakes, ask the Lord:
Creative God, where are you leading me in the minutes, days, and months ahead? Equip me for whatever changes are to come.
After your bread has cooled enough for you to eat, pick it up, breathe in its scent, and take in its beauty and nourishment. Let a smile form as you thank God for the ability to make something so delicious.
Let your eating be a prayer of its own, a sign of your gratitude to God as well as God’s good gift to you.
Adapted from "Bake & Pray" by Kendall Vanderslice. Copyright © 2024. Used by permission of Tyndale House Publishers, a division of Tyndale House Ministries. All rights reserved.
Every morning, as my kindergartener and I embark on her trip to school, we stop at a cafe for breakfast and a coffee. I love the routine, and Middle European cafe culture in general, because it allows me to connect with her before she starts her day and further assimilates us in the country in which we are grateful guests. It’s in these little moments where I get a sense of Hungarian lifestyle and of the good things I might integrate into my own when I return home.
These delicious homemade turnovers are filled with tart cherries, wrapped with the butter and richness of puff pastry to balance each bite. They are my daughter’s favorite. A Hungarian staple!
Where I am, the heat still hasn’t tapered off: The dog days of summer are clinging to our forecasts like stubborn residue on your favorite steel pan.
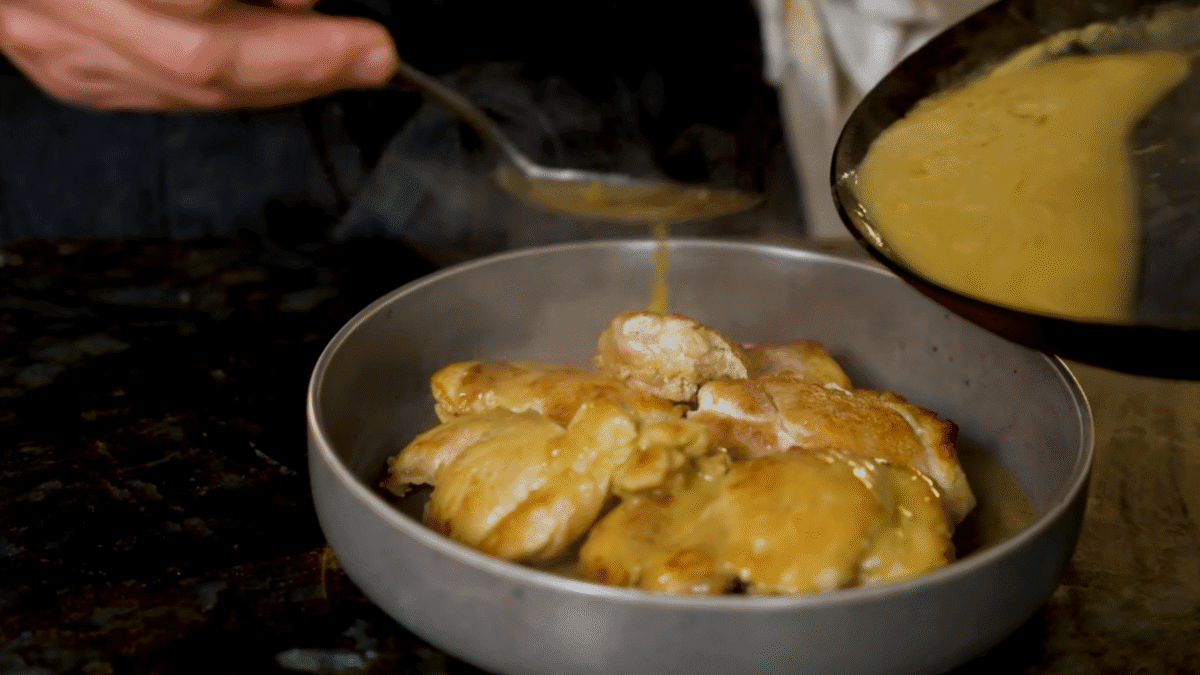
It feels like it’s going to take a miracle for the dog days to leave. Until then, this recipe for Greek lemon chicken will have to do. It's a very nice bridge from summer to fall and reheats well for leftovers. It pairs beautifully with a cold cucumber salad (or squash, if it ever starts feeling autumnal around here).
Get our your favorite family casserole dish and prepare for a healthy meal to share. Note: Marinate the chicken overnight for best results.
Also: I've recently developed a fondness for finishing salts. Lately, I've been enjoying the many varieties Jacobsen Salt Co. makes from salt it harvests from Netarts Bay in Oregon. This Infused Black Garlic Salt would make a great topping for this particular dish; it could also make a nice housewarming or Christmas gift. Too soon to be thinking about that? Not if you’re a homemaker!
 These make-ahead, hard-to-mess-up combinations involve just enough effort to turn a weeknight gathering into a memorable meal.
 Twenty-five gift ideas to make merry every homemaker you're shopping for this Christmas.
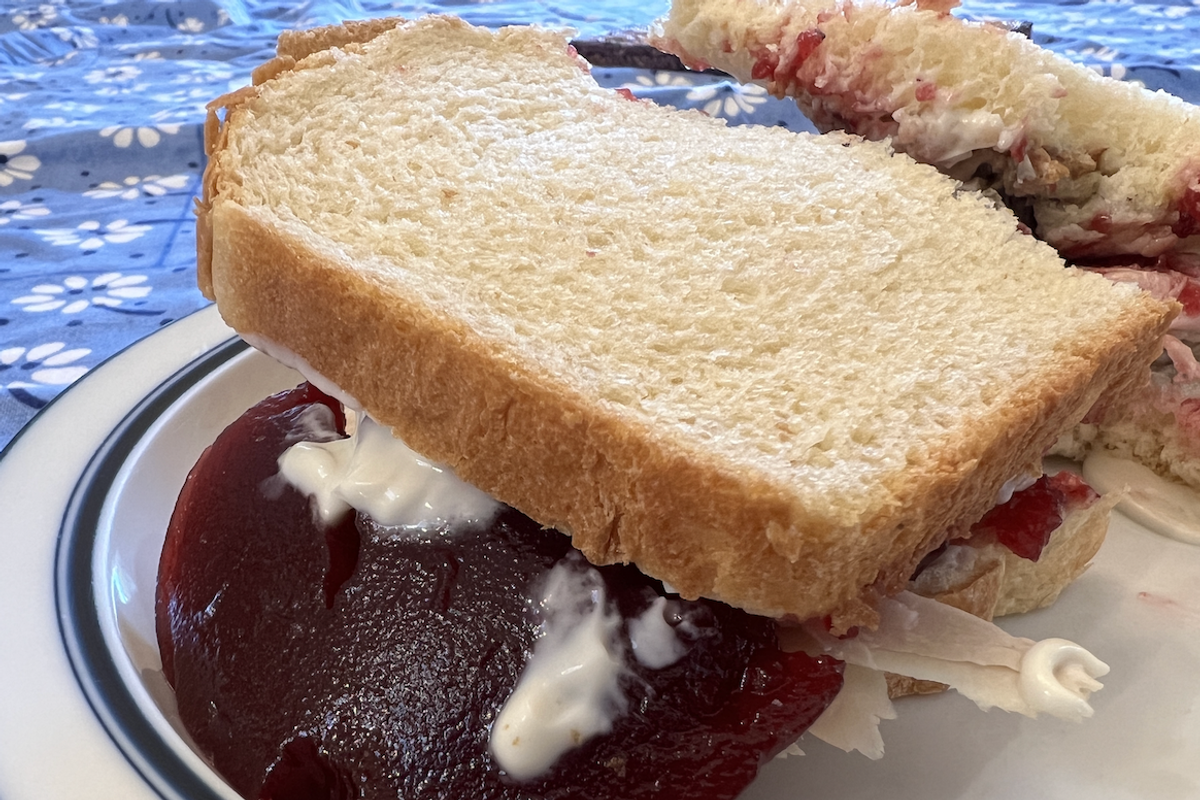

 If you make one dessert this year, first of all, what's wrong with you? But second of all, make it this one.
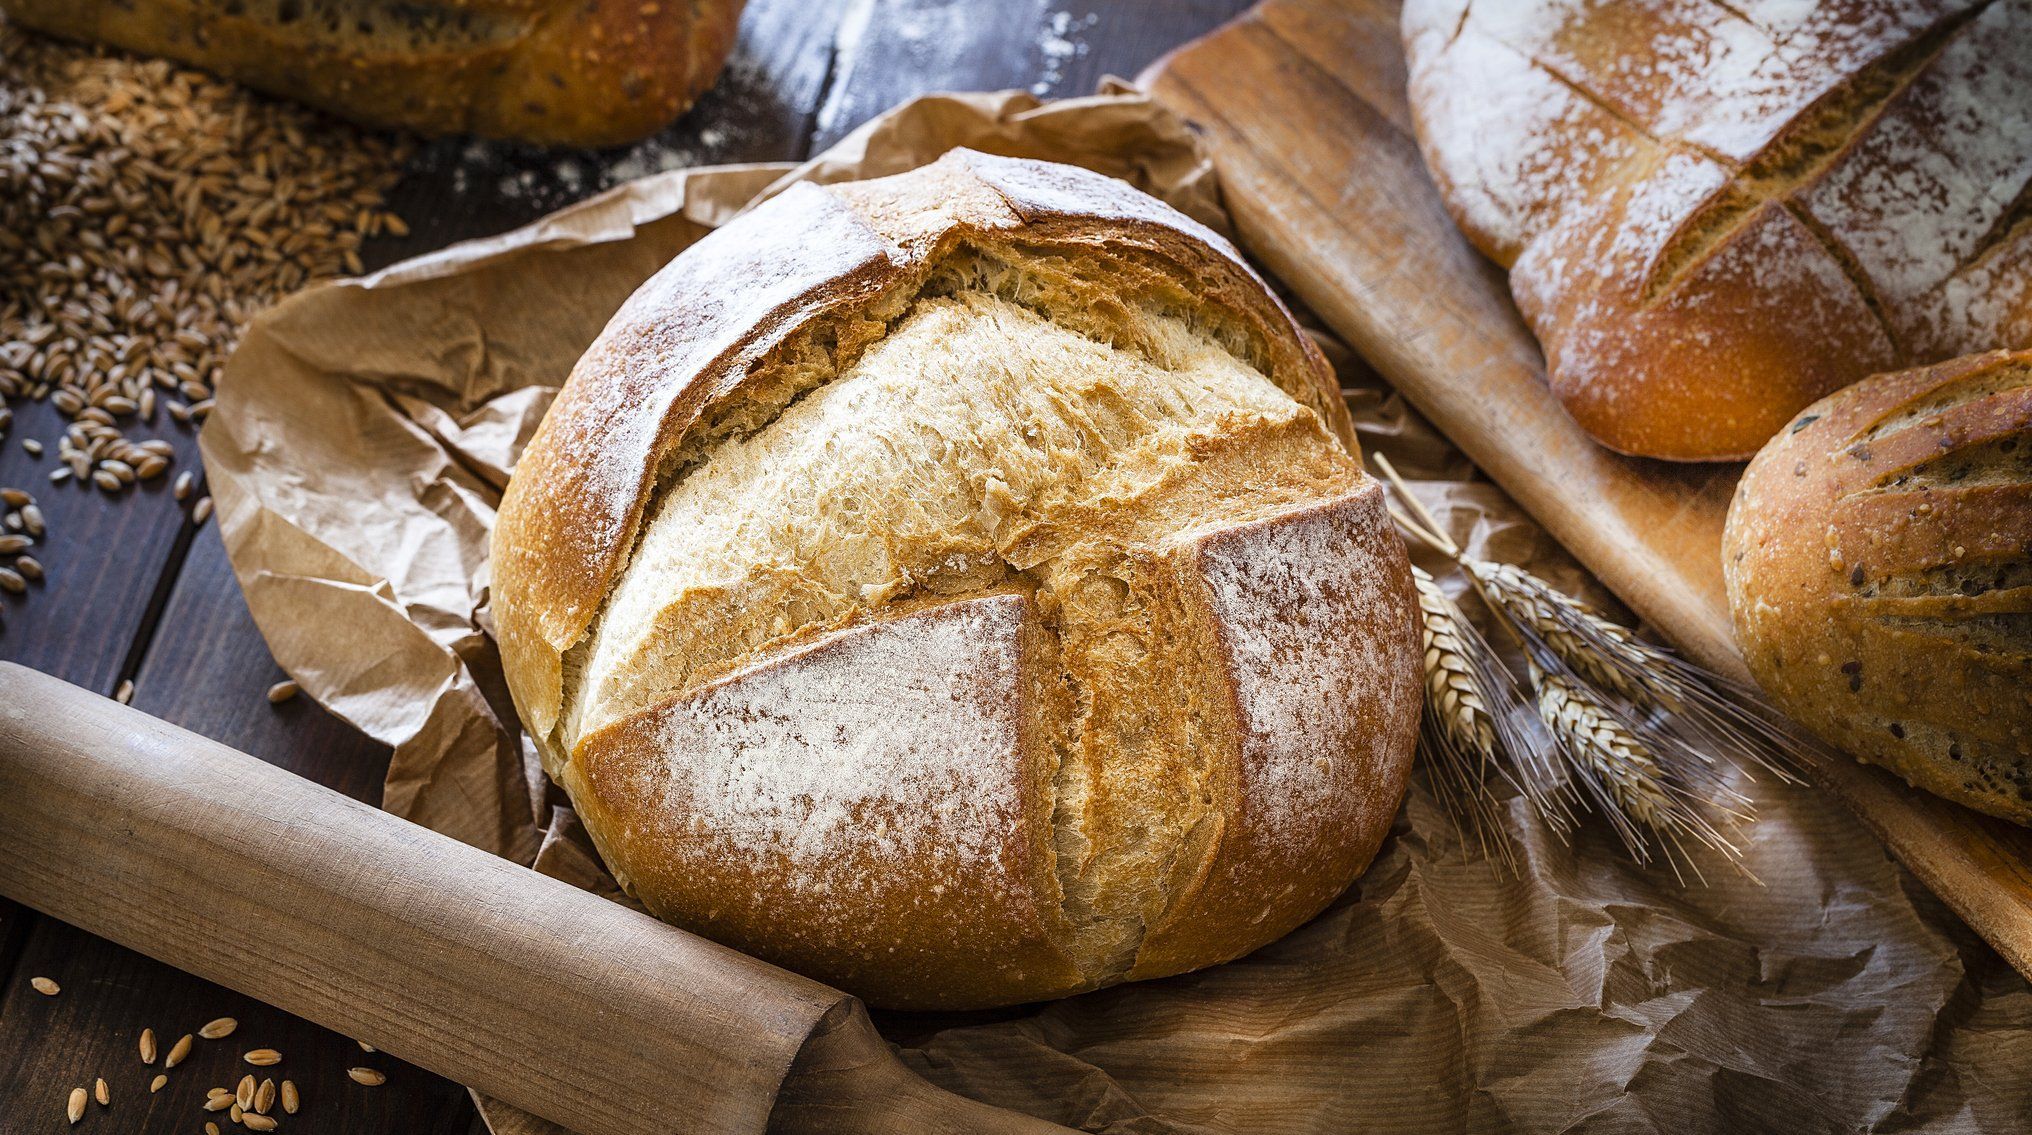

 Don’t play 'Never Have I Ever' with Kamala Harris. She would kill at that game.